
WasherBot and DryerBot, Part 1: How to Tell If an Appliance Is Running
21 Nov 2016The time indicators on my washer and dryer are notoriously unreliable. Also, my and Mel’s busy brains occasionally forget that we started doing laundry. I wanted to build a system that would text me when my washer or dryer finished running.
Table of Contents
- Part 1: How to Tell If an Appliance Is Running
- Part 2: Current Sensors and Burden Resistors
- Part 3: Connecting to the Pi and Building a Voltage Divider
- Part 4: A Low-Pass Filter and Reading From Laundry Appliances
- Part 5: A Measurement Algorithm and Text Message Integration
When I last ran into a problem that would require this kind of measurement, I turned to some preassembled USB temperature sensors and solved the problem with software only.
While searching for some hardware to help me tell if my washer or dryer were running, I came up empty - it seems like any prefab way to measure this would involve either buying a new washer and dryer or buying expensive hardware. I therefore decided to make my first foray into electronics hardware.
How to Tell If an Appliance Is Running
The first part of getting my washer to text me that it’s done is to tell when it is running. I thought of a few ways to do this:
-
Tap into the circuitry of the appliance and check if a certain part is running. This will work well for “smart” appliances with circuit boards, but would require messing around inside the washer/dryer, possibly voiding my warranty, and needing to come up with a new method if I get a new washer/dryer.
-
Sense vibration the way that a few other online solutions do. This seemed highly error-prone to me.
-
Measure the power consumption of the appliance with a Hall effect sensor. If the appliance is consuming power, consider it “running.” This would involve putting a sensor inline with the power cable feeding an appliance, such as the ACS712. This is a more-attractive option because it’s a one-size-fits-all approach for both the washer and the dryer and could be extended to other appliances like a dishwasher or a rice cooker. The downside is that it involves interrupting the flow of power and messing with mains power, which is risky.
-
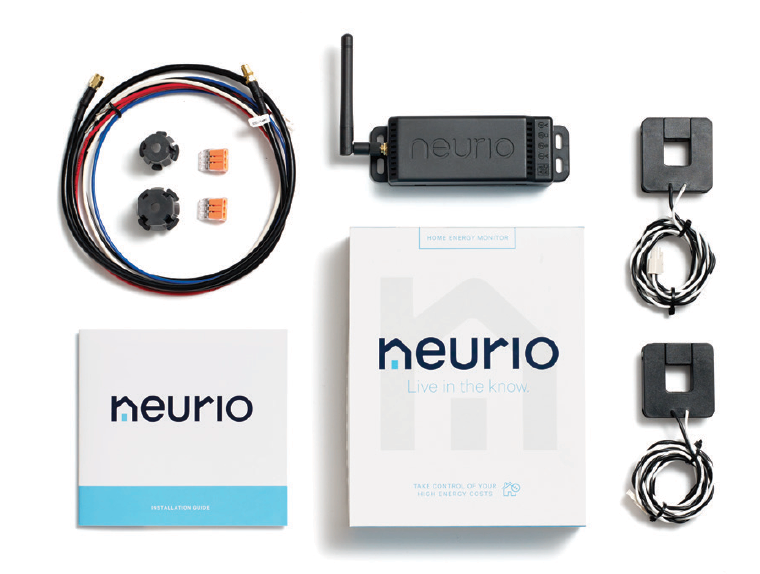
Measure power as in option 2, but instead use a noninvasive current transformer sensor. This what whole-home monitoring solutions like Neurio use. Neurio is one of the premade options I considered, but it seems too unproven and new. CT sensors use a ring-shaped clamp that goes around one of the wires in the circuit. This has the benefit of being wholly separate from the mains current, making it safer.
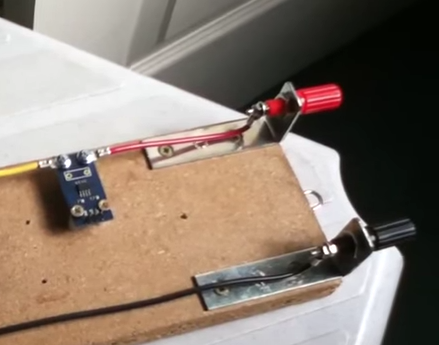
I opted to use a CT sensor. Since I already had a Raspberry Pi available, I decided I would use it as the platform for building my device. It has the benefit of being easy to program, running a full Linux desktop environment, and having tons of forum support online. Another option is to use an Arduino. In the future, I’d like to try migrating to a standalone, low-power board like the ESP8266.
CT sensors are very sensitive - they can measure current to a precise degree and can be used to tell exactly how much power you’re consuming. My needs are a lot simpler - I don’t need to know how much power is being consumed, just whether or not it is.
So here are the building blocks: a Raspberry Pi to run software and send text messages; current sensors to measure the power usage, and…something in the middle.
Something in the Middle
One thing I quickly realized is that the Raspberry Pi does not have an analog input. Raspberry Pi’s inputs, called general-purpose-input-output or GPIO, can only tell whether a voltage is above a certain threshold (“high”) or below it (“low”), because they are digital inputs.
Current sensors work by taking a high voltage current at high amperage and converting it down to a few milliamps of current at only a few volts. But since they are measuring alternating current, the voltage will be rapidly switching signs back and forth:
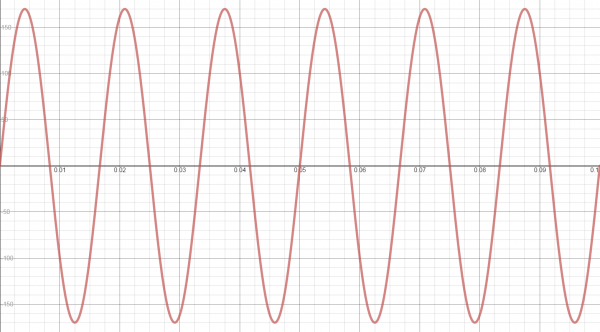
Theoretically, I could have used the GPIO to measure this state with only 1 bit of resolution (very crude, only on or off). I wanted something a little more precise, and some Googling led me to an Analog to Digital Converter (ADC).
An ADC takes an analog signal and discretizes it - from an infinite number of values to specific steps. Since I wanted to measure 2 inputs (washer and dryer), I got a 2-channel ADC, the MCP3002. This chip has a 10-bit resolution, which gives you 1024 possible values instead of only 2. Much better.
Stay tuned for Part 2, in which I put together a parts list and get to soldering.